
Is your favorite pan looking a bit dull with stubborn black marks? It happens to the best of us. That burnt-on mess can be frustrating, making your cooking experience less enjoyable and your cookware look less appealing.
You might be wondering if it’s time to buy a new pan. But before you do, this guide will show you effective and simple methods to tackle that black residue, restoring your pan’s shine and functionality. Get ready to learn techniques that save you money and bring your cookware back to life, increasing your confidence in the kitchen.
Understanding Black Residue on Pans
Black residue on pans is a common cooking challenge that many home cooks encounter. This section will explore what this stubborn residue is, why it forms, and the different types of pans it can affect. Understanding the cause is the first step to effectively removing it and preventing it from returning.
We’ll break down the science behind burnt-on food and grease so you can approach the cleaning process with knowledge.
What Causes Black Residue
Black residue on cookware is typically a buildup of burnt food particles, carbonized grease, and polymerized oils. This happens when food is cooked at high temperatures, especially if there isn’t enough liquid or fat to prevent direct contact with the hot pan surface. Over time, these layers can harden and become extremely difficult to remove with regular washing.
The longer the residue is left untreated, the more it can bake onto the pan, creating a persistent problem.
Different cooking methods can contribute to this issue. Searing meats at very high heat, for example, can easily leave behind charred bits. Similarly, frying foods with sugary marinades can lead to rapid caramelization and burning.
Even simmering sauces for extended periods without stirring can result in sticking and burning at the bottom. The type of cooking oil used also plays a role; oils with low smoke points are more prone to breaking down and forming sticky residues when heated too high.
- Burnt Food Particles: When food bits char, they leave behind a black, carbonized layer. This is organic material that has been exposed to excessive heat.
- Carbonized Grease: Fats and oils, when overheated, break down and turn into a black, sticky substance. This is often referred to as polymerized grease.
- Polymerized Oils: Cooking oils, especially when used repeatedly at high temperatures, can undergo polymerization. This process creates a hard, resin-like coating that sticks to the pan.
These elements combine to form a tough, dark layer. This is not just a cosmetic issue; it can affect how your pan heats evenly. A pan with a thick layer of residue may develop hot spots, leading to uneven cooking and making it harder to achieve desired results.
Regular cleaning after each use is key to preventing this buildup, but sometimes even diligent washing isn’t enough.
Types of Pans Affected
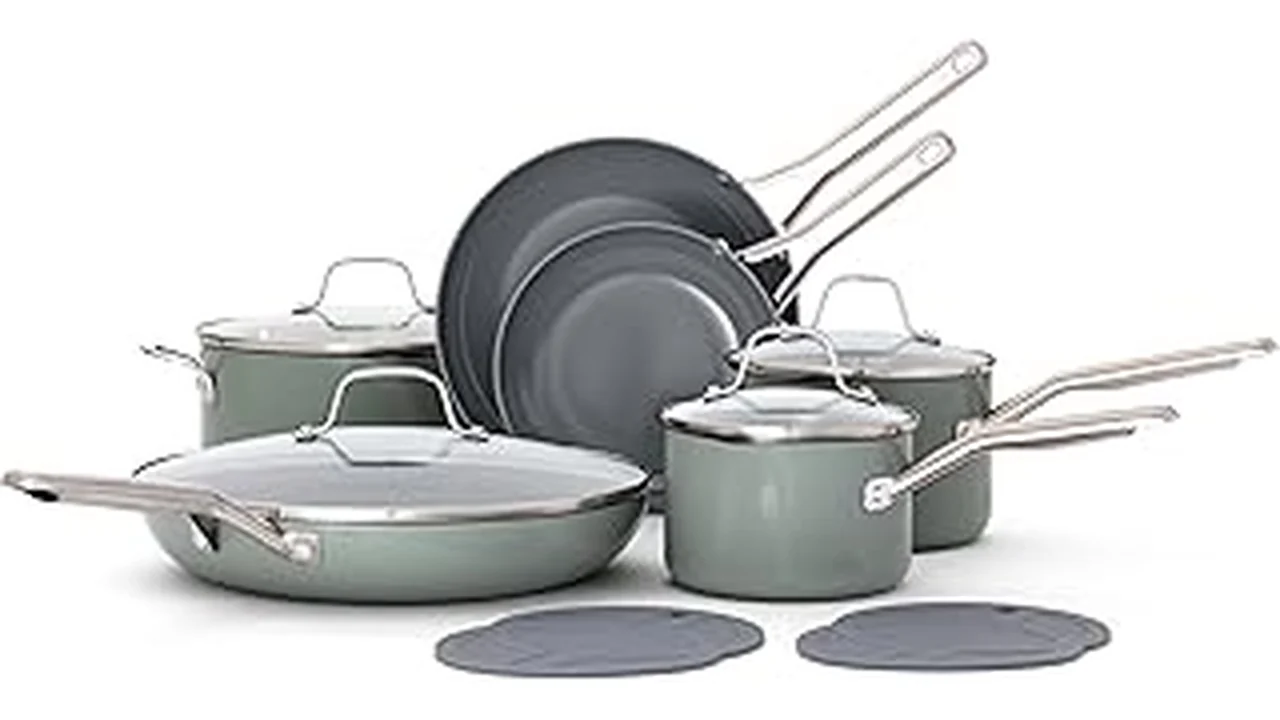
Almost any type of cookware can develop black residue, but some materials are more susceptible or require specific cleaning approaches. Cast iron skillets, for example, are known for their durability but can develop a thick layer of seasoning that, if neglected or improperly cleaned, can turn into problematic black buildup. Stainless steel pans are generally resilient but can show burnt-on food and grease quite prominently.
Non-stick pans, while designed to prevent sticking, can still suffer from residue buildup if the coating is damaged or if cooking temperatures exceed recommendations. Even copper and aluminum pans can show these dark marks.
For stainless steel, this often looks like dark spots or rings that are hard to scrub away. The metallic surface can be unforgiving to abrasive cleaners, which might scratch it. Cast iron users might see their well-established seasoning layer darken and become sticky or uneven due to burnt-on food.
Non-stick surfaces can be more delicate. While they resist sticking, aggressive cleaning methods on burnt residue can damage the non-stick coating itself, making future cooking more challenging.
- Cast Iron: Can develop thick, hard-to-remove black seasoning if not maintained properly.
- Stainless Steel: Shows visible black marks from burnt food and grease, often requiring strong cleaning agents.
- Non-Stick Cookware: While less prone to severe buildup, can still get residue if overheated or if non-stick coating is compromised.
- Copper and Aluminum: These metals can react with acidic foods or high heat, leading to discoloration and residue.
Understanding your pan’s material helps determine the best cleaning strategy. Harsh scrubbing that might be fine for stainless steel could ruin a non-stick surface. Choosing the right method ensures you remove the black residue without damaging your valuable cookware.
Effective Methods How To Remove Black Residue From Pan
This section covers the most effective methods for tackling that stubborn black residue on your pans. We will explore various cleaning agents and techniques, ranging from simple household items to more specific cleaning solutions. The goal is to provide you with a comprehensive toolkit to restore your pans, no matter how tough the buildup.
You’ll learn how to approach each method safely and efficiently.
Using Baking Soda and Water Paste
Baking soda is a fantastic natural abrasive and deodorizer, making it a go-to for many cleaning tasks. For black residue, creating a thick paste of baking soda and water can work wonders. Apply the paste generously over the affected areas, let it sit for a while to soften the grime, and then gently scrub.
This method is safe for most pan types and is an eco-friendly option. It’s a gentle yet effective way to lift away burnt-on food and grease without harsh chemicals.
To make the paste, mix about half a cup of baking soda with just enough water to form a thick, spreadable consistency. It should be like toothpaste. Spread this paste all over the burnt-on areas.
For very stubborn spots, you can let the paste sit for 30 minutes to an hour, or even overnight for extreme cases. The baking soda will absorb some of the grease and begin to break down the burnt particles.
After the paste has had time to work, use a non-abrasive sponge or a soft cloth to scrub the pan. You might need to add a little more water or baking soda paste as you go. Rinse thoroughly and check the results.
For most moderate cases, this is often all you need. If residue remains, you can repeat the process or try a slightly more intensive method.
- Mix baking soda with water to create a thick paste.
- Apply paste generously to the black residue.
- Let it sit for at least 30 minutes, or longer for tougher stains.
- Scrub gently with a non-abrasive sponge or cloth.
- Rinse thoroughly and repeat if necessary.
This method is particularly good for everyday burnt-on messes. It’s a cost-effective solution and readily available in most kitchens. The mild alkalinity of baking soda helps to break down grease and lift away burnt food particles without damaging the pan’s surface.
It’s a great first step before resorting to harsher cleaners.
The Vinegar and Water Boil Method
White vinegar is another kitchen staple with powerful cleaning properties, thanks to its acidity. When combined with heat, its effectiveness is amplified. For pans with significant black residue, boiling a mixture of equal parts white vinegar and water inside the pan can loosen even the most stubborn burnt-on bits.
The acidity of the vinegar helps to dissolve carbonized food and grease, making it easier to scrub away.
Fill the pan with a solution of half white vinegar and half water. Ensure the liquid covers the burnt areas. Bring this mixture to a boil on the stovetop.
Let it simmer for about 10-15 minutes. As it simmers, you should notice the black residue starting to lift and soften. Be cautious of the fumes; ensure your kitchen is well-ventilated.
After boiling, carefully pour out the hot vinegar-water solution. Allow the pan to cool slightly, then use a spatula or scraper to gently lift away the loosened residue. For any remaining tough spots, you can make a paste from baking soda and water and scrub them.
Rinse the pan well with water to remove any vinegar smell or residue. This method is excellent for stainless steel and enamel-coated pans.
- Combine equal parts white vinegar and water in the pan.
- Bring the mixture to a rolling boil.
- Simmer for 10-15 minutes.
- Carefully discard the hot liquid and allow the pan to cool.
- Scrape off softened residue and wash as usual.
This technique is especially effective on stainless steel pans that have developed dark, burnt-on rings or spots. The acidity of the vinegar breaks down the chemical bonds in the burnt food and grease. For tough stains, you might need to repeat the boiling process or let the vinegar solution soak in the cool pan for a longer period.
Always ensure good ventilation when boiling vinegar.
Using Cream of Tartar
Cream of tartar, a byproduct of winemaking, is an acidic salt that can be surprisingly effective for cleaning cookware. It’s particularly good at brightening and removing stains from aluminum and stainless steel surfaces. When mixed with water to form a paste or boiled in the pan, it helps to lift discoloration and burnt-on residue.
It’s a gentler alternative to harsher chemicals but packs a good punch.
To use cream of tartar as a paste, mix two tablespoons with a little water until it forms a spreadable consistency. Apply this paste to the black residue and let it sit for about 15-20 minutes. Then, scrub with a soft cloth or sponge.
For a boiling method, add 2 tablespoons of cream of tartar to about 2 cups of water in the pan and boil for 10-15 minutes. After cooling, scrub and rinse.
This method is also beneficial for restoring the shine to dull aluminum cookware. The acidic nature of cream of tartar helps to break down oxidation and mineral deposits that can cause dullness and staining. It’s a safe option for most non-stick surfaces as well, though always test a small, inconspicuous area first if you are concerned about damaging a delicate coating.
The result is a cleaner, brighter pan.
- Create a paste with cream of tartar and water.
- Apply paste to residue and let sit for 15-20 minutes.
- Alternatively, boil cream of tartar and water in the pan for 10-15 minutes.
- Scrub gently with a soft cloth or sponge.
- Rinse thoroughly and dry.
Cream of tartar is a mild acid that excels at removing tarnish and burnt-on food. It works by chemically reacting with the oxidized metal and food particles, loosening their grip on the pan’s surface. This makes it an excellent choice for those who prefer natural cleaning solutions.
It can also help to restore a bit of the pan’s original luster, making it look almost new again.
Specialized Cookware Cleaners
For extremely stubborn black residue, or if you prefer a dedicated cleaning solution, specialized cookware cleaners can be very effective. These products are often formulated with stronger agents designed to break down tough grime, carbonized grease, and burnt-on food without damaging the cookware. Brands offer cleaners specifically for stainless steel, cast iron, and even non-stick surfaces, so it’s important to choose one appropriate for your pan material.
Always read and follow the manufacturer’s instructions carefully when using specialized cleaners. Many require you to apply the cleaner, let it sit for a specified time, and then scrub with a specific type of pad or brush. Some might involve a short boiling period.
Ensure good ventilation, as some of these cleaners can have strong odors. After cleaning, rinse the pan thoroughly and dry it immediately to prevent water spots.
These cleaners can save you time and effort compared to repeated applications of home remedies for very tough stains. They are formulated for specific types of cookware, meaning they are generally safe when used as directed. For instance, a cleaner designed for stainless steel might contain mild abrasives that would be too harsh for a non-stick coating.
Always look for products that are explicitly recommended for your pan’s material.
- Choose a cleaner formulated for your specific pan material (stainless steel, cast iron, etc.).
- Read and strictly follow the manufacturer’s instructions for application and dwell time.
- Ensure good ventilation while using the cleaner.
- Scrub with the recommended tool (e.g., soft sponge, non-scratch pad).
- Rinse the pan thoroughly and dry it immediately.
These commercial products often contain a blend of surfactants, mild acids, or alkalis that are very effective at cutting through grease and dissolving burnt organic matter. They can be a lifesaver for neglected pans or for those times when everyday cleaning just doesn’t cut it. Using them correctly ensures you get maximum cleaning power without compromising the integrity of your cookware.
Cleaning Specific Pan Materials
While general methods can apply to most pans, the material of your cookware dictates the safest and most effective approach to removing black residue. This section dives into the nuances of cleaning cast iron, stainless steel, non-stick, and other common pan types. Understanding these material-specific tips will help you avoid damage and achieve the best results when you need to remove black residue from pan surfaces.
How To Clean Cast Iron Pans
Cast iron pans require a unique approach due to their seasoning layer, which is essential for their non-stick properties. Harsh scrubbing or abrasive cleaners can strip this seasoning, leading to rust and a less effective cooking surface. To remove black residue from cast iron, avoid soap if possible, or use a very mild, plant-based soap sparingly.
The primary goal is to lift the burnt bits without damaging the seasoned surface.
For light residue, a stiff brush or a chainmail scrubber can often remove burnt-on food after cooking. If the residue is more stubborn, use a spatula or scraper while the pan is still warm. For baked-on black residue, try simmering water in the pan for a few minutes to loosen it.
You can also use coarse salt as a mild abrasive; pour a generous amount into the warm pan and scrub with a paper towel or cloth. This helps to lift stuck-on food without stripping the seasoning.
After cleaning, it’s crucial to re-season your cast iron pan. Dry it thoroughly immediately after washing, then apply a thin layer of cooking oil (like vegetable, canola, or flaxseed oil) to the entire surface, inside and out. Heat the pan in a moderate oven (around 350-400°F or 175-200°C) for about an hour, then let it cool.
Repeating this seasoning process periodically will build and maintain a robust, non-stick surface and protect against rust.
- Use a stiff brush or chainmail scrubber for light residue.
- For tougher spots, try simmering water in the pan.
- Coarse salt can act as a mild abrasive; scrub with paper towels.
- Avoid harsh soaps and steel wool, which strip seasoning.
- Always dry thoroughly and re-season after cleaning burnt residue.
The seasoning on cast iron is essentially a layer of polymerized oil that has bonded to the metal. When you remove black residue, you want to disturb this layer as little as possible. If you accidentally remove too much seasoning, the metal is exposed and prone to rust and sticking.
Re-seasoning replenishes this protective layer, ensuring your cast iron remains non-stick and durable for years to come.
How To Clean Stainless Steel Pans
Stainless steel is durable and resistant to rust, making it a popular choice for cookware. However, it can show burnt-on food and black residue quite prominently. The good news is that stainless steel can handle a variety of cleaning methods, from gentle scrubbing to more potent cleaners.
When tackling how to remove black residue from pan surfaces made of stainless steel, you have a few effective options.
For everyday burnt-on food, hot water, dish soap, and a non-abrasive scrub pad usually do the trick. If residue is more stubborn, the baking soda paste or vinegar and water boil methods described earlier are excellent choices. For really tough stains that resist these methods, you can use a specialized stainless steel cleaner or even a bit of Bar Keepers Friend.
This cleaner contains oxalic acid, which is very effective at removing discoloration and burnt-on grime from stainless steel.
When using abrasive cleaners or scrubbers on stainless steel, always scrub in the direction of the metal’s grain to avoid visible scratches. After cleaning, rinse the pan thoroughly and dry it immediately with a soft cloth to prevent water spots and maintain its shine. Regular cleaning after each use is the best way to prevent severe buildup on stainless steel cookware.
- Start with hot water, soap, and a non-abrasive sponge.
- Try baking soda paste or the vinegar boil method for tougher stains.
- Specialized stainless steel cleaners or Bar Keepers Friend can be used for very stubborn residue.
- Always scrub in the direction of the grain to prevent scratching.
- Rinse well and dry immediately to prevent water spots.
Stainless steel’s robustness allows for more aggressive cleaning compared to non-stick surfaces. The key is to use cleaning agents that target the specific type of residue. Oxalic acid in products like Bar Keepers Friend is particularly good at dissolving metal oxides and burnt-on food, restoring the bright finish of stainless steel.
Just be mindful of the grain to keep your pans looking their best.
How To Clean Non-Stick Pans
Non-stick pans require a delicate touch. The key to cleaning black residue from non-stick pans is to avoid damaging the non-stick coating. Harsh abrasives, steel wool, or aggressive scrubbing can scratch or remove the coating, rendering the pan ineffective and potentially harmful.
Always err on the side of caution when cleaning non-stick cookware.
For most common messes, a soft sponge or cloth with warm, soapy water is sufficient. If you notice some sticking or light residue after cooking, try simmering a small amount of water in the pan for a few minutes to loosen it. You can also gently use a silicone or wooden spatula to scrape away softened bits while the pan is still warm.
The baking soda paste method can be used, but be very gentle when scrubbing.
Avoid using vinegar boils or strong chemical cleaners on non-stick surfaces, as these can degrade the coating over time. If residue persists, it might be a sign that the non-stick coating is already compromised. In such cases, it might be best to consider replacing the pan.
When cleaning, never use metal utensils to scrape, and always wash by hand rather than in a dishwasher, which can be too harsh for the coating.
- Use only soft sponges or cloths and mild dish soap.
- Simmer water in the pan to loosen light residue.
- Gently scrape softened bits with silicone or wooden utensils.
- Avoid abrasive scrubbers, steel wool, and harsh chemicals.
- Never put non-stick pans in the dishwasher.
The delicate nature of non-stick coatings means that prevention is as important as cleaning. Proper use and cleaning techniques will prolong the life of your non-stick pans. If you find yourself frequently dealing with burnt-on residue on a non-stick pan, it might be a sign that cooking temperatures are too high or that it’s time for a replacement, as damaged non-stick surfaces are hard to repair.
Cleaning Other Pan Types (Copper, Enameled Cast Iron)
Other popular cookware materials like copper and enameled cast iron have their own cleaning considerations. Copper pans can develop a dull, tarnished patina and also suffer from burnt-on food. Enameled cast iron, while tough, can also experience burnt food sticking to its surface.
For copper cookware, you can use a paste made of lemon juice or vinegar mixed with salt or baking soda to remove tarnish and light burnt-on residue. Gently rub the paste onto the copper surface, let it sit for a few minutes, then rinse and polish. For enameled cast iron, start with the gentler methods like soaking in warm, soapy water.
If residue persists, the baking soda paste is often effective. Avoid using steel wool or highly abrasive cleaners, as these can scratch the enamel. Boiling a mixture of water and a few tablespoons of baking soda can also help loosen stuck-on food on enameled surfaces.
When cleaning copper, remember that the patina is a natural characteristic and some people prefer to keep it. If you aim for a bright, shiny finish, regular cleaning with acidic solutions will be necessary. For enameled cast iron, treat it similarly to how you would a heavy-duty non-stick pan—gentle is usually best.
Always dry these pans thoroughly after cleaning to prevent water spots or damage.
- Copper: Use lemon juice/vinegar with salt/baking soda paste for tarnish and residue.
- Enameled Cast Iron: Start with warm, soapy water; baking soda paste is effective.
- Avoid abrasive cleaners on both copper and enamel to prevent scratching.
- Dry thoroughly after cleaning to maintain the finish and prevent damage.
- For enameled cast iron, refrain from using steel wool or harsh scrubbers.
Copper reacts to heat and air, developing a patina. Cleaning it with acidic substances reverses this effect, returning it to its shiny state. Enameled cast iron offers the durability of cast iron with a protective, non-reactive enamel coating.
While this coating resists rust, it can still get burnt-on food, and aggressive cleaning can chip or scratch it, so a careful approach is necessary.
Preventing Future Black Residue
Once you’ve successfully removed the black residue from your pans, the next crucial step is to prevent it from returning. Prevention is always easier than cure. By adopting good cooking and cleaning habits, you can keep your cookware in pristine condition and avoid the frustration of dealing with stubborn burnt-on messes.
These practices will not only save you time but also extend the lifespan of your pans.
Proper Preheating and Cooking Temperatures
One of the most common reasons for black residue is overheating the pan before adding food or cooking at excessively high temperatures. This can cause oils to break down and food to burn and stick. Always preheat your pan gradually over medium heat.
For most cooking, medium heat is sufficient, and high heat should be used sparingly and with caution, especially with oils. Learn your stovetop’s settings and your pan’s heat distribution to avoid hot spots.
Allowing the pan to reach the desired temperature gradually before adding oil or food helps ensure even heating. If you add oil to a pan that is too hot, it can smoke and break down immediately. If you add food to a cold pan, it’s more likely to stick and then burn as the pan heats up.
Pay attention to cooking times and adjust heat as needed. Many recipes can be completed effectively without resorting to the highest heat settings, which often lead to burnt food and difficult-to-clean pans.
- Always preheat pans gradually over medium heat.
- Avoid using the highest heat settings unless absolutely necessary.
- Allow the pan to reach temperature before adding oil or food.
- Learn your stovetop’s heat zones for more even cooking.
- Use the right amount of cooking fat to prevent sticking.
Understanding how your specific stovetop and cookware interact with heat is key. Induction cooktops, for example, heat very quickly and directly, requiring precise temperature control. Gas stoves offer more immediate visual feedback but can have uneven heat distribution.
By being mindful of your cooking temperatures, you significantly reduce the chances of food burning and creating that dreaded black residue.
Effective Cleaning After Each Use
The most effective way to prevent significant buildup is to clean your pans immediately after each use, or as soon as they are cool enough to handle. Leftover food particles and grease have a much harder time bonding to the surface if they are removed while still fresh. Don’t let dirty pans sit in the sink overnight; the residue can harden and become much more difficult to remove.
Washing pans soon after cooking requires less effort and fewer harsh cleaning agents. A quick wash with warm, soapy water and a sponge is usually all that’s needed. This habit not only keeps your pans looking good but also ensures you’re cooking with a clean, efficient surface every time.
If you’re cooking something that tends to leave residue, like sticky sauces or seared meats, consider soaking the pan in warm water for a few minutes immediately after use before washing.
- Clean pans immediately after they have cooled down.
- Use warm, soapy water and a soft sponge for regular cleaning.
- Soak pans briefly if dealing with particularly sticky or burnt-on food.
- Dry pans thoroughly after washing to prevent water spots.
- Avoid letting dirty pans sit for extended periods.
Developing a routine of cleaning your cookware promptly after cooking is one of the simplest yet most impactful habits you can adopt. This minimizes the risk of food particles and grease carbonizing and bonding to the pan. It’s a small effort that makes a big difference in maintaining your cookware and making future cooking experiences more enjoyable.
Proper Storage of Cookware
How you store your pans can also play a role in maintaining their condition and preventing damage that might lead to residue issues. Stacking pans directly on top of each other without protection can cause scratches, especially to non-stick surfaces. These scratches can create areas where food is more likely to stick and burn, leading to residue.
Use pan protectors, cloths, or towels between stacked pans to safeguard their surfaces.
Ensure that your pans are completely dry before storing them. Storing damp pans, especially cast iron, can lead to rust. For cast iron, a light coat of oil applied before storage can offer further protection.
If you hang your pans, ensure they are securely placed to avoid them falling and getting damaged. Proper storage helps preserve the integrity of your cookware, ensuring it remains functional and looks its best for longer.
- Use pan protectors or cloths when stacking pans to prevent scratches.
- Ensure pans are completely dry before storing.
- Apply a light coat of oil to cast iron before storing.
- Hang pans securely if using a hanging rack.
- Store pans in a way that protects their cooking surfaces from damage.
Taking a few moments to store your cookware correctly can prevent minor damages that, over time, can compromise the cooking performance of your pans. Scratches and dents are not only unsightly but can also make it harder to clean and more likely for food to adhere and burn, thus creating the very black residue you worked to remove.
Frequently Asked Questions
Question: How often should I deep clean my pans for black residue
Answer: Deep cleaning is usually needed only when you notice significant buildup or burnt-on stains that regular washing doesn’t remove. For most users, this might be a few times a year or only when a specific incident occurs, like burning a meal.
Question: Can I use steel wool on my pans
Answer: Generally, steel wool is too abrasive for most pans, especially non-stick and enameled surfaces, as it can scratch and damage the coating. It might be suitable for heavily seasoned cast iron or very robust stainless steel, but caution is advised.
Question: What is the best method for burned-on grease
Answer: For burned-on grease, a baking soda paste or a vinegar and water boil method is often very effective. Specialized degreasers for cookware can also work well, but always follow product instructions carefully.
Question: Will these methods damage my pan’s coating
Answer: The methods described are generally safe when applied to the appropriate pan material. However, always avoid harsh abrasives on non-stick and enameled surfaces to prevent coating damage. Always test a small, inconspicuous area first if unsure.
Question: Can I use these methods on a stovetop that is not flat
Answer: The boiling methods (vinegar or water) are best used on flat stovetops where the liquid can evenly cover the bottom of the pan. For heavily curved pans, focus on applying pastes directly to the residue and scrubbing.
Summary
Removing black residue from your pans is achievable with the right techniques. From simple baking soda pastes to vinegar boils and specialized cleaners, you have options for different levels of grime and pan materials. Always remember to clean gently, especially on non-stick surfaces, and dry thoroughly.
Prevention through proper heating and prompt cleaning after each use will keep your cookware looking great and performing well for years to come.


Leave a Reply